52 Dozen Weeks 18-31
Yep, I am THAT far behind with posting my
recipes and shared love of baking with friends. I have actually been baking and
giving goodies away almost every week minus the two weeks we were out of the
country and one week when Vince wasn’t feeling well. Here are the recipes I’ve
done and who I’ve given them to…ready? This is a lot of baking goodness to take
in!
And GO!
Week 18:Lemon Creme Cookies. I shared these
with a friend who is newer to having two children and is so sweet. I miss
seeing her and her family since they moved a bit of a drive away but I've
valued her friendship for over 5 years of living here in NC and love the way
she encourages me and shares her life with me even though it takes added effort
for us to see each other since we no longer share the same church or live very
close together. It's nice knowing God gives us friends that stick out the
changes in life and choose to be your friend even when life makes it seem inconvenient.
Here's the recipe for the cookies:
Ingredients:
1/2 cup butter
1 cup sugar
1/2 tsp vanilla
1 egg
1 Tbsp. lemon zest
1 Tbsp. fresh lemon juice
1 1/2 cups flour
1/4 tsp baking powder
1/8 tsp baking soda
1/4 tsp salt
1/2 cup powdered sugar for rolling
Instructions:
1.
Cream butter and sugar in a large mixing
bowl. Beat in vanilla, egg, lemon zest, and lemon juice.
2.
Add flour, baking powder, soda, and
salt. Stir till well combined.
3.
Roll dough in 1″
balls, then roll in powdered sugar.
4.
Place on lightly greased baking sheets.
Bake at 350° for 9-11 minutes, or till set and crackly.
5.
After a couple minutes, remove to
cooling racks to cool completely.
-Makes about 2 1/2 dozen cookies
Week 19: Butter Cookies for a local school
office. I brought these by one of the schools I work with for their staff.
Teachers do so much to make my job of serving children with food on the
weekends possible so with this school in particular I know they go above and
beyond to make it happen for their school and it wouldn’t run so smoothly at
their school without this office staff. Here’s the recipe:
Ingredients:
·
1 cup unsalted butter, room temperature
·
2/3 cup granulated white sugar
·
1 large egg
·
1 teaspoon lemon or orange zest (outer
skin) (optional)
·
1 teaspoon pure vanilla extract
·
2 1/4 cups all purpose flour
·
1/4 teaspoon salt
Instructions:
1.
In the bowl of your electric mixer, or
with a hand mixer, beat the butter and sugar until light and fluffy. Beat
in the egg, zest, and vanilla extract.
2.
In a separate bowl, whisk together the
flour and salt. Gradually add the flour mixture to the creamed mixture and beat
just until incorporated. Scrape down the sides of the bowl as
needed. Divide the dough in half and shape each half into a log (round or
square) that is about 1 1/2 inches in diameter. Wrap each log in plastic wrap
and place in the refrigerator until firm (at least two hours or preferably
overnight). (Can freeze the unbaked logs for up to two months.) Once the log is
firm, with a sharp knife, slice cookies about 1/8 - 1/4 inch (.3-.5 mm) thick.
3.
Preheat oven to 350 degrees F. Place
oven rack in the center of the oven. Line a baking sheet with parchment
paper.
4.
Place the cookies on the baking sheet,
spacing about 2 inches (5 cm) apart. If you like, make an egg wash by beating
one egg white with 1 teaspoon water. Brush cookies with the egg wash and
sprinkle with chopped nuts or colored sugar. Bake the cookies for about 10-15
minutes, or until the edges of the cookies are golden brown. Remove from oven
and place on a wire rack to cool. Unfrosted, these cookies can be stored
several weeks at room temperature.
Week 21: Frosted Sugar Cookie Bars which were
given to some co-workers who came to a meeting I planned for an upcoming event
I’m a part of planning. It’s something extra on top of each of our jobs so to
plan it takes an added amount of commitment. I know everyone in our field is
more committed than the average Joe but I totally LOVE the people in other
agencies that I work with because they feel like the most genuine, caring
people in the world who really love what they do, just like I do. Collaborating
and working with other agencies who serve people of need in varied ways is
definitely one of my favorite parts of my job. Here’s the recipe:
Ingredients:
- 1/2
cup unsalted butter, softened to room temperature
- 3/4
cup granulated sugar
- 1
large egg + 1 egg yolk
- 2
teaspoons vanilla extract
- 1
and 1/2 cups all-purpose flour
- 1/4
teaspoon salt
- 1
teaspoon baking powder
- 1/2
teaspoon baking soda
- 1
and 1/2 teaspoons cornstarch
- 1/2
cup rainbow sprinkles
Vanilla Frosting
- 3/4
cup unsalted butter, softened to room temperature
- 2
and 1/4 cups confectioners' sugar
- 3
Tablespoons heavy cream or half-and-half
- 1
teaspoon vanilla extract
- salt,
to taste
Optional
- food
coloring for frosting (I used 1 drop red for this pink frosting)
- extra
sprinkles for decorating on top
Instructions:
- Make the
bars: Preheat oven to 350°F
(177°C). Line an 8-inch or 9-inch square baking pan with aluminum
foil, making sure to leave enough overhang on the sides. Set aside.
- In
a large bowl using a hand-held mixer or stand mixer fitted with a paddle
attachment, cream the softened butter for about 1 minute on medium speed.
Get it nice and smooth, then add the sugar on medium speed until fluffy
and light in color. Beat in egg, egg yolk, and vanilla. Scrape down the
sides as needed.
- In
a medium bowl, whisk together the flour, salt, baking powder, baking soda,
and cornstarch. With the mixer running on low speed, slowly add the dry
ingredients to the wet ingredients in 3 different parts. The dough is
quite thick. Once combined, gently fold in 1/2 cup sprinkles using a rubber
spatula (or by mixing on low speed).
- Press
the cookie dough evenly into the prepared baking pan. Bake for 25-26
minutes or until very lightly browned on top. You want the cookie bars to
be extra soft, so careful not to overbake. Allow the bars to cool
completely on a wire rack at room temperature before frosting. The center
will slightly sink - that's normal.
- Make the
frosting: If you don't want a super thick
layer of frosting as pictured, halve the frosting recipe. With a handheld
or stand mixer fitted with a paddle attachment, beat the butter on medium
speed until creamy - about 2 minutes. Add confectioners' sugar, cream, and
vanilla extract with the mixer running on low. Increase to high speed and
beat for 3 full minutes. Add more confectioners' sugar if frosting is
too thin or more cream if frosting is too thick. Add a pinch of salt
if frosting is too sweet. I usually add anywhere between 1/8 - 1/4
teaspoon of salt. Beat in food coloring, if using.
- Remove
cooled bars from the baking pan using the aluminum foil overhang on the
sides. Frost the bars with a thick layer of frosting and decorate with
extra sprinkles if desired. Cut into squares. Use a very sharp knife and
wipe off with a paper towel between each cut to make neat, even cuts.
Store bars in an airtight container at room temperature for up to 2 days
and in the refrigerator up to 5.
- Make
ahead tip: You can make these bars and the
frosting 1 day in advance-- store the bars, covered, at room temperature
overnight and store the frosting, covered, in the refrigerator. Frost
before cutting and serving. You can also freeze the unfrosted bars for up
to 3 months. Thaw overnight in the refrigerator, frost, cut, and serve.
Additional Notes:
Room temperature egg and egg yolk
preferred. To bring the egg to room temperature quickly, place in a warm
glass of water for about 10 minutes as you get the other ingredients ready. Or
just set out when you set out the butter to soften 1 hour ahead of time. Use
regular sprinkles (aka "jimmies") in the cookie bar base. Nonpareils
(the little balls) will bleed their color and turn the sugar cookie dough
green/purple/brown. Cream or half-and-half is preferred for creamiest,
fluffiest frosting. Keeping that in mind, milk would be an OK substitute if you
do not have either on hand.
Week 22: Triple Chocolate Brownie Cookies.
These were AWESOME, and I have made them before. We brought these with us to
meet some friends at the splash pad. Vince has two other little ones that are
his size at church and we met them for some fun in the sun! Along with the two
little ones are three older siblings of the other kids and Vince loves being a
part of a crowd of kids. He loves to watch and laugh with them. Here’s the
recipe:
Ingredients
- 1
cup salted butter (melted and cooled - directions in step one)
- 1½
cups granulated sugar
- 2
teaspoons vanilla
- 2
eggs
- 3
tablespoons strong coffee
- 2⅔
cup all purpose flour (more if it's too sticky)
- ½
cup cocoa powder
- 1
teaspoon baking soda
- ½
teaspoon salt
- 2
cups chocolate chips (or more if you’re like me!)
Instructions
- Prepping
the Butter: Melt ½ cup butter in the microwave
for 30-45 seconds or until completely melted. Transfer to the refrigerator
or freezer and cool until solid, about 30 minutes. Leave the other ½ cup
butter out on the counter to bring it to room temperature. If the butter
is rock solid (usually from the freezer) I stick it back in the microwave
for 10 seconds to get it workable again. See notes for more info.
- Dough
Part One: Preheat the oven to 350 degrees. With an
electric mixer (I usually just use a hand-held one), cream the
melted/solid butter, room temperature butter, sugar, and vanilla until
creamy and fluffy. Add the eggs and mix until just incorporated.
- Dough
Part Two: In a separate bowl, combine the flour,
cocoa powder, baking soda, and salt. Add the flour mixture to the creamy
butter mixture and mix until incorporated, adding the coffee gradually as
you go. The dough should be thick and sticky, but dry enough to touch with
your hands without making a huge mess. If it's still too sticky, add more
flour. Stir in the chocolate chips.
- Baking:
Roll the dough into even balls (I got about 20 out of the whole batch) and
place on a baking sheet lined with parchment paper. Bake for 8 minutes and
transfer to a cooling rack right away. They will be underdone and super
puffy, which makes them perfectly soft, thick, and fudgy when cooled.
Week 23: Strawberry Crème Cake. I tried to
decorate this according to something I saw on Pinterest using Twizzlers….it
turned out OK but certainly not as fancy as their picture! We had an impromptu
neighborhood block party and invited a ton of our neighbors over. Since we were
discussing it all via Facebook posts a friend of mine saw it and invited
herself over, which I LOVE. She’s awesome like that and truly seems to feel
comfortable anywhere she is, which I admire. She’s a dear friend and of course
was welcome to crash our neighborhood party. The cake tasted great and happened
to land on the actual birthday of one of the neighbor’s kids so it worked out
pretty well! Here’s the recipe for the cake:
Ingredients:
1 Strawberry cake mix
3 Eggs
1 cup water
1/3 Cup vegetable oil
Strawberry Creme
Passion Pudding
1 small box
Strawberry Creme instant pudding
1 can sweetened
condensed milk (I Used Lowfat)
1 cup milk
1/2 cup heavy
whipping cream
Whipped Cream Layer
1 & 1/2 cups
heavy whipping cream
1 teaspoon Vanilla
extract
1 tablespoon powdered
sugar
Optional: Sprinkles
Instructions
Preheat
oven @ 350 degrees. Spray 9x13 pan with non-stick spray and set aside.
Strawberry Cake
1.
In mixing bowl, combine cake mix, eggs,
water, and oil with mixer for 3 - 4 minutes.
2.
Pour into prepared baking pan and bake
25-30 minutes or insert a toothpick in the center until it comes out clean.
3.
Let cake cool.
4.
When cooled, then poke many holes in the
cake with the end of a wooden spoon.
Strawberry Creme
Passion Pudding
1.
After the cake has cooled, to make the
pudding, pour strawberry creme instant pudding into a medium bowl and add milk
and sweetened condensed milk. Using mixer, beat for 3 minutes.
2.
Then add in the 1/2 cup heaving whipping
cream and beat for another 2 minutes and pour the pudding mixture on top of
cake and fill all the holes.
3.
Spread it out by using the back of
spoon.
4.
Cover Cake and put in refrigerator to
set up.
Whipped Cream Layer
1.
Using mixer, whip 1 & 1/2 cups of
heavy whipping cream until whipping cream consistency.
2.
Add in vanilla and powdered sugar and
take cake out of fridge and layer Cool Whip over pudding mixture.
3.
Set in refrigerator for 2 hours or
freeze before serving. Serve cold.
Week 24: Watermelon Cupcakes. I don’t do this
much but I used a box cupcake mix and did not alter it at all. I usually use
them as an element of a new creation but this time I stuck to the box’s recipe
and it was…interesting.
Although they were super yummy for the first bite, after two bites I was glad I
made them mini cupcakes because they ACTUALLY tasted like that watermelon gum
you can buy which is good but just not meant to be eaten in large quantities. I
brought about half of these cupcakes to a friend’s home for dinner. We
thoroughly enjoy hanging out with her whole family of three boys and two girls.
Vince loves all the activity of a large family so it’s nice to have friends who
invite us to be a part of their lives since Vince is the ‘only’ for now. I gave
out the rest of these to my women’s Bible study group. Since this was a
seasonal box mix I don’t have any way to share the recipe for duplication.

Week 26: Caramel Coffee Butter Cake. I took a
recipe for a Kentucky Butter Cake and added coffee and caramel creamer to it
for a little bit of rich flavor and boy was it yummy! I made this for a friend
who was packing up her home to move to a new home on the other side of town. I
kept a few large slices for myself since Here’s the recipe with my added
elements:
Ingredients
Cake
·
1 cup butter, cubed at room temperature
·
2 cups granulated sugar
·
4 eggs
·
1 tablespoon vanilla
·
3 cups all purpose flour
·
1 teaspoon kosher salt
·
1 teaspoon baking powder
·
½ teaspoon baking soda
·
1 cup buttermilk
·
½ cup caramel coffee creamer
Butter Glaze
·
⅓ cup butter
·
½ cup coffee, strong, black, and cold
·
¾ cup granulated sugar
·
2 tablespoons water
·
2 teaspoons vanilla
Instructions
1. Preheat
the oven to 325°F
2. Grease
a 10" bundt pan with butter or shortening very liberally. Dust the pan
with flour and set aside.
3. Place
all the cake ingredients in the bowl of your stand mixer fitted with the paddle
attachment. Mix on low for 30 seconds and then increase the speed to medium and
mix for 3 minutes.
4. Pour
the batter into the prepared pan and bake for 65-75 minutes until a toothpick
entered into the center comes out clean.
5. When
the cake is done make the glaze. Combine all ingredients into a small saucepan
over medium-low heat. Stir continuously until the butter is melted and the
sugar is dissolved. Do not bring to a boil.
6. Poke
holes all over the warm cake using a knife (or I found that using a straw to
poke the holes created deeper crevices for the glaze to get into the cake) and
pour the glaze on the cake while still in the pan.
7. Allow
the cake to cool completely in the pan and then invert the cake onto a
serving plate.
8. I
actually like to make this cake a day in advance, finding it to be more moist
and flavorful when it rests overnight.
Week 27: Oreo cheesecake for a friend’s wedding
shower. This is an original recipe since I’ve been in the personal business of
making cheesecakes of various flavors for years. J There is no real way of sharing this
recipe! It’s a little different every time I make it and based on the flavor
I’m going with but here is the basic recipe for the cheesecakes I make. I
almost ALWAYS double or triple the recipe and make multiple cheesecakes because
they freeze very easily for thawing and eating anytime within 6 months of
making. If you’re going to go through all the trouble of making a cheesecake,
why not make several to enjoy anytime or have handy to give away at any time?
Ingredients
Crust
- 2 cups of Graham
cracker crumbs (a little less than 2 packages Graham crackers)
- 2 Tbsp sugar
- Pinch salt
- 5 Tbsp unsalted
butter (if using salted butter, omit the pinch of salt), melted
Filling
- 2 pounds cream
cheese, room temperature
- 1 1/3 cup granulated
sugar
- Pinch of salt
- 2 teaspoons
vanilla
- 4 large eggs
- 2/3 cup sour cream
- 2/3 cup heavy
whipping cream
- Flavor: If you are
making an oreo cheesecake you’ll want to add about half a package of
oreos, chopped into smaller pieces using a blender. Don’t chop until it is
crumbs, just chop a few second so they are smaller pieces. If you are
doing a caramel cheesecake you will want to drizzle caramel throughout the
filling before adding it to the crust and baking. If you are doing a dark
chocolate cheesecake you will want to add cocoa powder and sugar, this is
where I said it gets tricky with the numerous variations I’ve done over
the years.
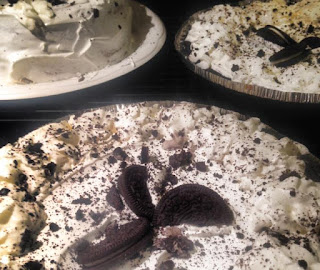
Toppings
- This will vary
based on the flavor you choose. In mine I chose oreo and decided to cut
oreo cookies in half and put a dollop of whipped cream on each ‘slice’ all
the way around the rim of the cake and then half of an oreo wedged upright
to look like the Cheesecake Factory version of the oreo cheesecake. I also
decided to drizzle chocolate syrup and spread oreo crumbs all over the
top. I was making three cheesecakes so the ones pictured below are two smaller ones to accompany the large one I made.
Instructions:
1.
Preheat
oven to 350°F, with rack in lower third of oven. Pulse the graham crackers in a
food processor or blender until finely ground. Put in a large bowl, and stir in
the sugar and salt. Use your (clean) hands to stir in the melted butter.
2.
Put
the ingredients for the crust in the bottom of the springform pan. Gently press
down on the crumbs using your fingers, until the crumbs are a nice even layer
at the bottom of the pan, with maybe just a slight rise along the inside edges
of the pan. Place in the oven for 10 minutes. Remove from the oven and let
cool. Reduce the oven temperature to 325°F.
Make the
filling
1.
Cut
the cream cheese into chunks and place in the bowl of an electric mixer, with
the paddle attachment. Mix on medium speed for 4 minutes until smooth, soft and
creamy.
2.
Add
the sugar, beat for 4 minutes more.
3.
Add
the salt and vanilla, beating after each addition.
4.
Add
the eggs, one at a time, beating for one minute after each addition.
5.
Add
the sour cream, beat until incorporated.
6.
Add
the heavy cream, beat until incorporated.
7.
Remember
to scrape down the sides of the mixer bowl, and scrape up any thicker bits of
cream cheese that have stuck to the bottom of the mixer that paddle attachment
has failed to incorporate.
8.
Pour
the cream cheese filling into the springform pan, over the graham cracker
bottom layer.
9.
Smooth
the top with a rubber spatula.
10.
Place
the springform pan in the oven, on the lower rack.
11.
Cook
at 325°F for 1 1/2 hours.
12.
Turn
off the heat of the oven. Crack open the oven door 1-inch, and let the cake
cool in the oven, as the oven cools, for another hour. This gentle cooling will
help prevent the cheesecake surface from cracking.
13.
Cover
the top of the cheesecake with foil, so that it doesn't actually touch the
cheesecake. Chill in the refrigerator for a minimum of 4 hours, or overnight.
I had to work
fast when I made my last cheesecake so I actually cooled it in the oven for 30
minutes, pulled it out and cooled it completely with a fan, put it in the
freezer for 45 minutes then took it out to frost it the way I described above.
It still cracked and was not very even so I just added whipped cream topping to
make it appear even and pretty and then stuck it back in the freezer until I
had to go so it was done (with cooling time) in a little under 5 hours. Just in
case you don’t have time to wait for it to be cooled overnight! Although it is
MUCH prettier if it is cooled overnight.
Week 28: Cookies I didn’t have to bake…I
know this did not include any baking by myself but if I’m going to buy cookies,
I get them from Sam’s Club. Their bakery does them well! In all the prepping
for our trip I just didn’t have the time I thought I would so I bought this
large platter of wonderful cookies for a group of volunteers who came to work
in the warehouse, the HOT warehouse to pack boxes of food we give out to
families throughout the summer.
Week 29 and 30: Out of the Country (viable
excuse right??)
Week 31: This is actually this week and I gave
away another one of my oreo cheesecakes since I made three the day I brought
one to a friend’s wedding shower. We gave this one to our neighbors who so
kindly watched the dogs and the house while we were out of the country. They’ve
always been super generous and won’t allow us to pay them so instead we got
them beer from Belgium, some cookies and chocolates from Switzerland, and one
of my homemade oreo cheesecakes. It’s the least I can do for them being so nice
as to watch out for our home and puppies while we’re out of town throughout the
year. I plan to bake something for our church’s Celebration Sunday which is
happening tomorrow…I’m
thinking chocolate strawberry cupcakes. Mmmmm.
Thanks for reading! If you end up trying any of
these recipes let me know. I corrected several that I found some issues with
along the way to suit what I was trying to do and that’s all reflected in the
recipes above.


